How to Seamlessly Use Swift Package Manager (SPM) and CocoaPods (POD) Together with the Same SDK
Have you ever faced the challenge of testing your (or someone else’s) SDK that offers installation via Swift Package Manager or CocoaPods? How do you ensure it works seamlessly in both cases? If so, let me walk you through my journey and share the easiest way to achieve this. This article is a bit lengthy — so grab a cup of your favorite coffee, sit back, and let’s dive in!
Tip
The most interesting part begins with “But how to check if that SDK works also within CocoaPods?” Feel free to skip the preparation steps if they don’t interest you.
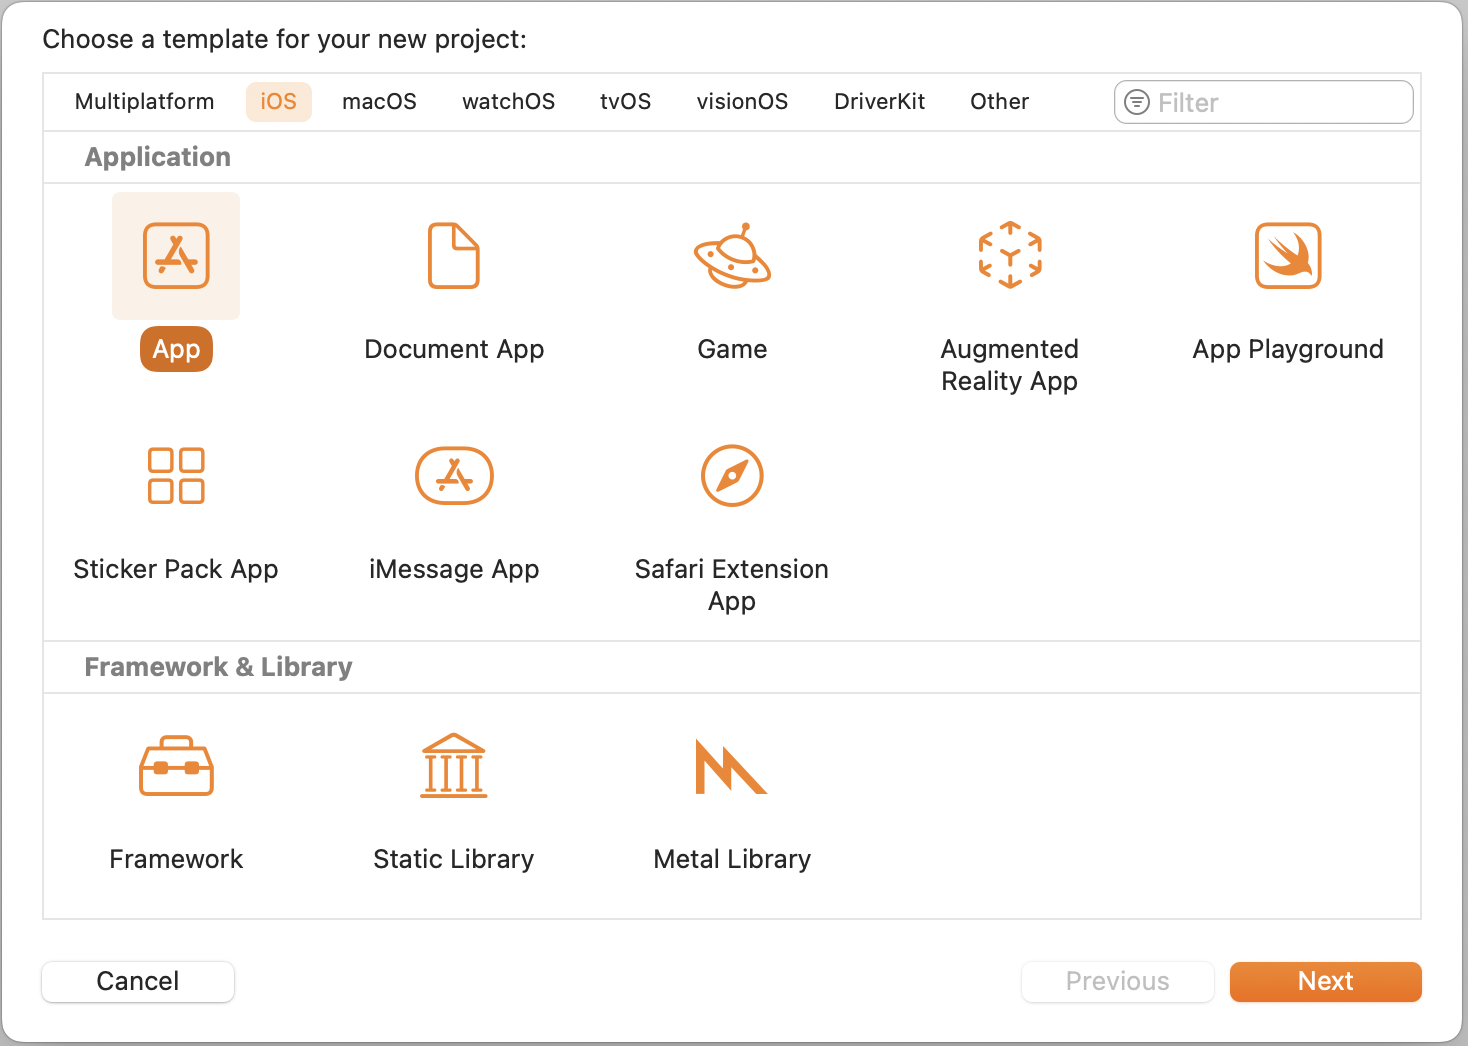
1. Initiate Project
-
Create a new project in Xcode: Choose a template for your project: iOS, App → Next button.
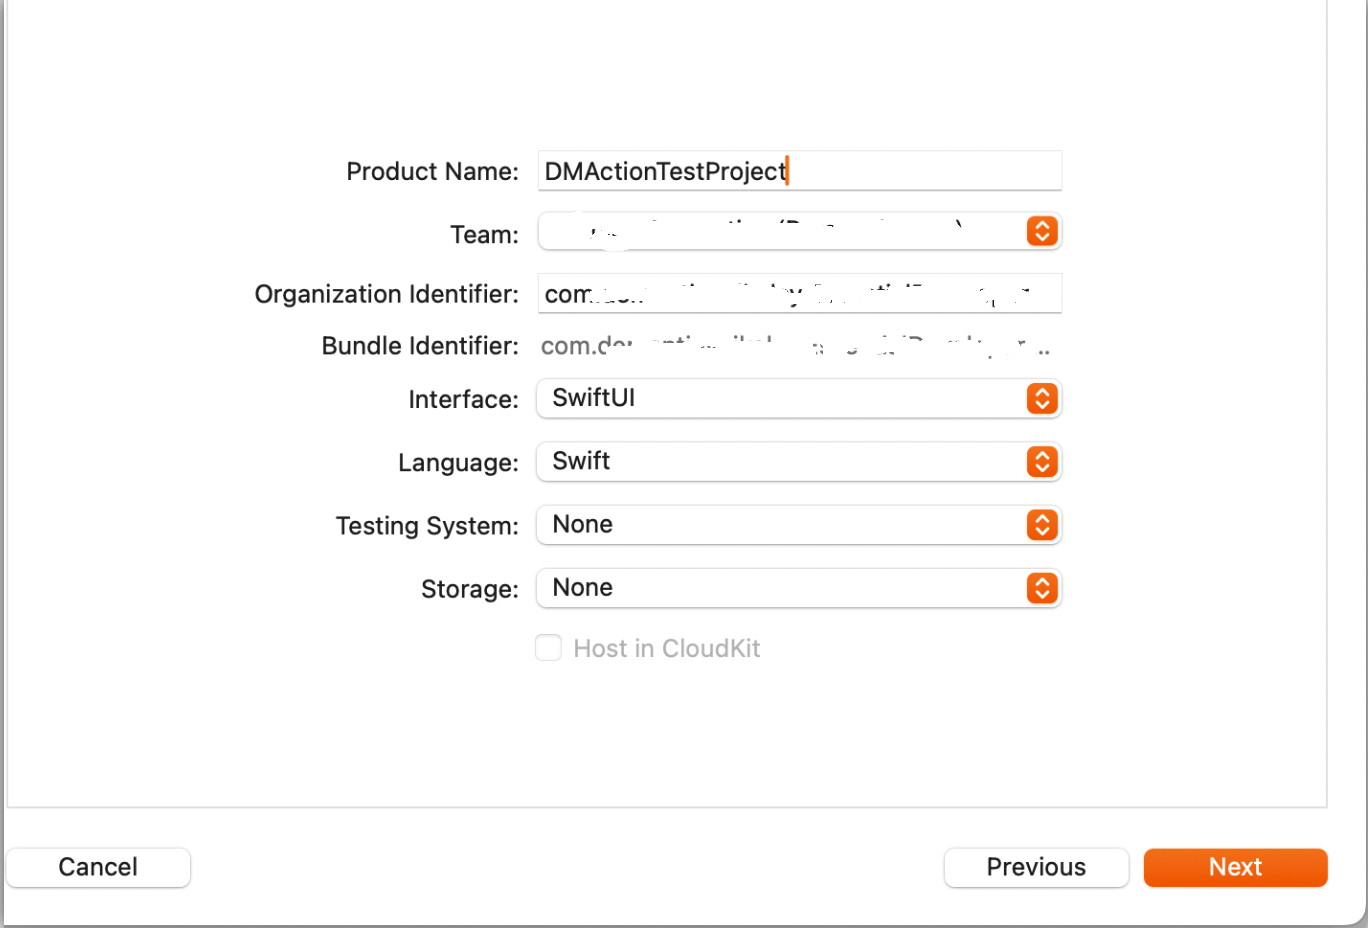
-
Choose the Product name, Interface: SwiftUI (let’s use this as the initial point), and the rest as described in the screenshot below:
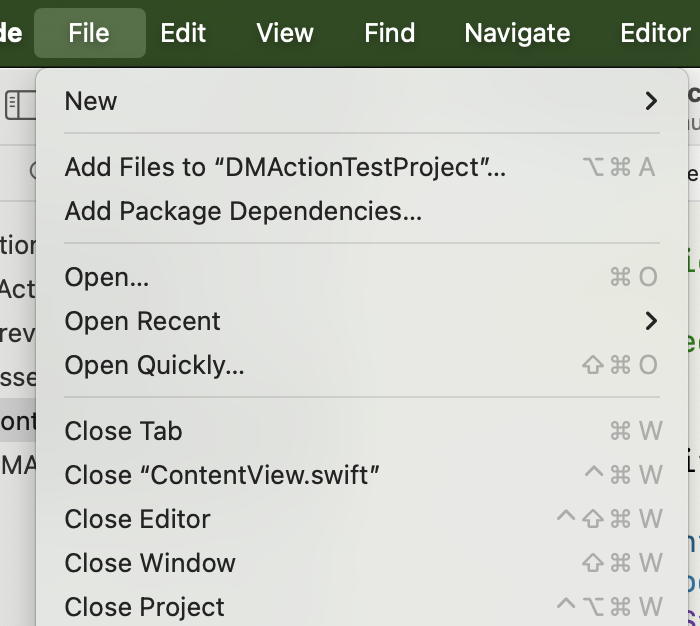
2. Add SDK as a Dependency via SPM
-
In Xcode, select File → Add Package Dependencies…
-
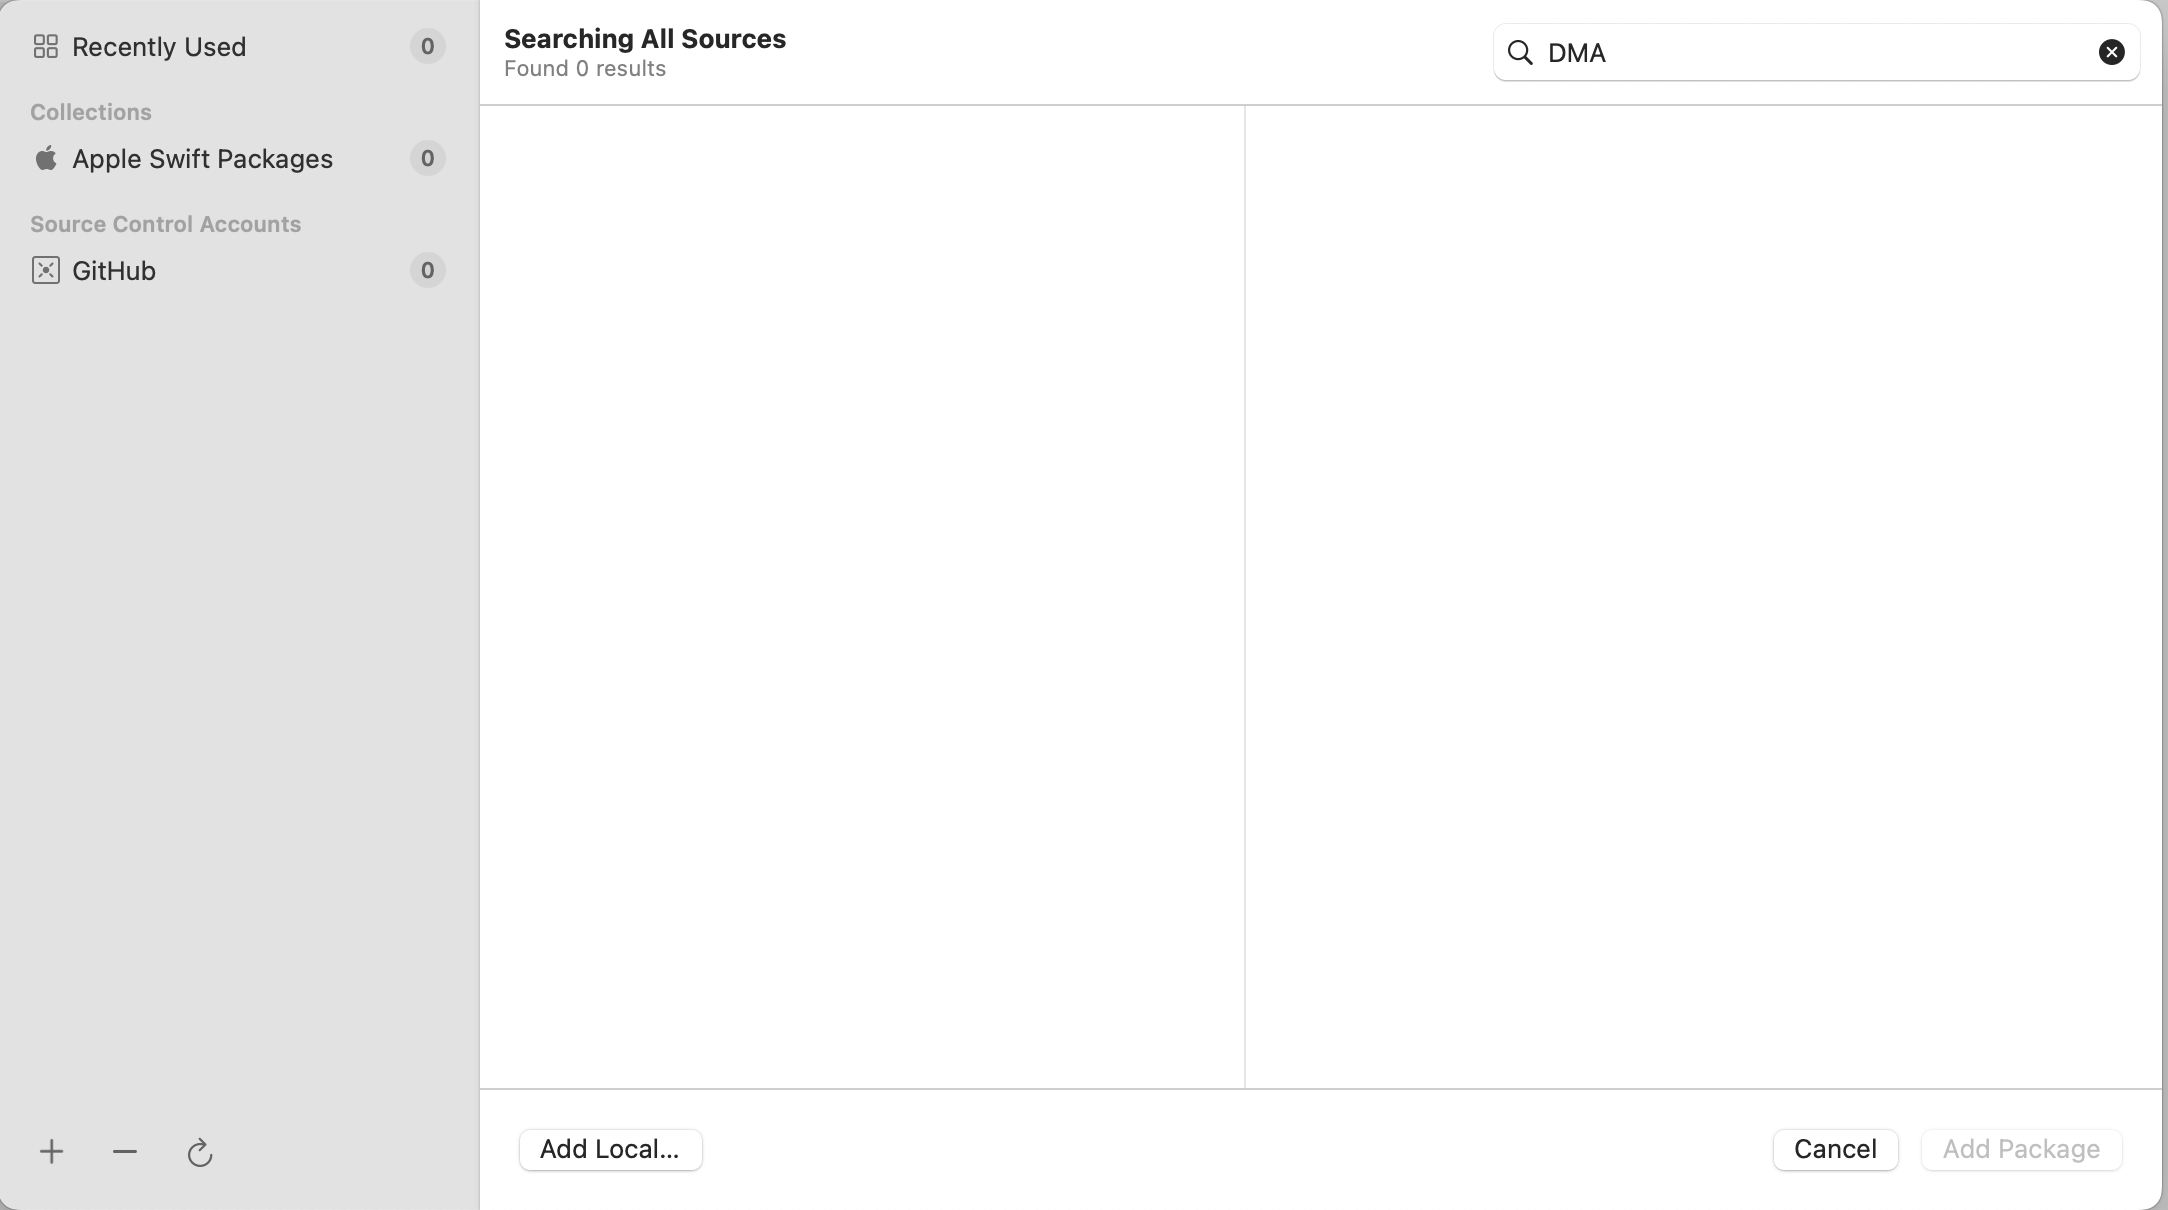
In my case, I’ll select Add Local—you can use the search field in the top-right corner to find the required SDK.
-
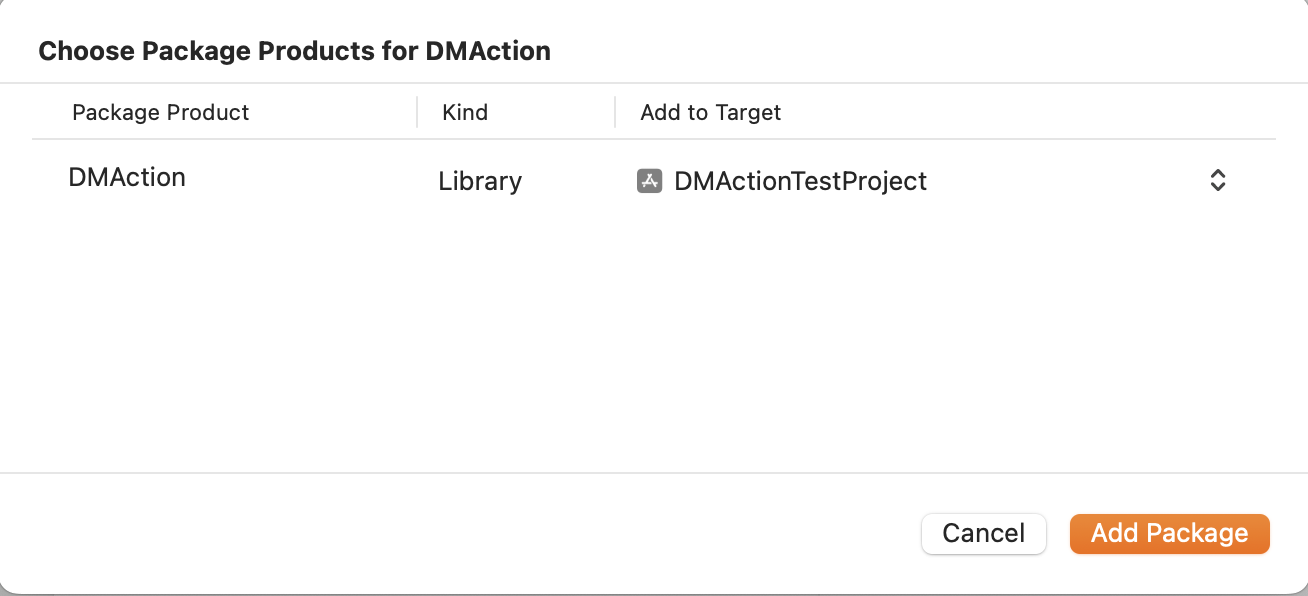
Check that the correct target is selected and press the Add Package button.
-
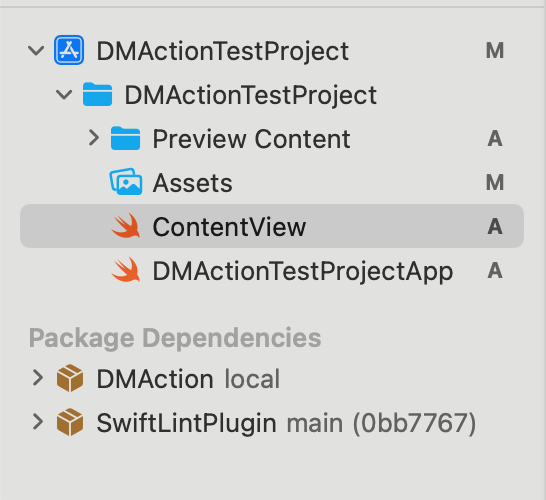
As a result, the dependency should be displayed in the Xcode project navigation tree like this:
3. Let’s improve ContentView to use our SDK:
import SwiftUI
import DMAction

struct ContentView: View {

    var body: some View {
        VStack {
            // If the result is completely uninteresting (muted)
            Button("Test button with muted result",
                   action: buttonTestActionWithMutedResult)
            // if you need to process the result
            Button("Test button with handled result",
                   action: buttonTestActionWithHandledResult)
        }
        .padding()
    }
}

private extension ContentView {

    func buttonTestActionWithMutedResult() {
        let primaryButtonAction = DMButtonAction(makeActionWithFailureResult)
        let fallbackButtonAction = DMButtonAction(makeActionWithSuccessResult)
        primaryButtonAction
            .retry(2)
            .fallbackTo(fallbackButtonAction)
            .simpleAction()
        print("\(#function) done")
    }

    func buttonTestActionWithHandledResult() {
        let primaryButtonAction = DMButtonAction(makeActionWithFailureResult)
        let fallbackButtonAction = DMButtonAction(makeActionWithSuccessResult)
        primaryButtonAction
            .retry(3)
            .fallbackTo(fallbackButtonAction)() { result in
                print("Attempt count: `\(result.attemptCount!)`")
                print("The result is: `\(result.unwrapValue())")
                // do something with result
            }
        print("`\(#function)` done")
    }

    func makeActionWithFailureResult(completion: @escaping (DMButtonAction.ResultType) -> Void) {
        // ... do something
        completion(.failure(NSError(domain: "TestDomain",
                                    code: 404,
                                    userInfo: nil)))
    }

    func makeActionWithSuccessResult(completion: @escaping (DMButtonAction.ResultType) -> Void) {
        // ... do something
        let yourResultVaue: Copyable = "\(#function) succeded!"
        completion(.success(yourResultVaue))
    }
}-
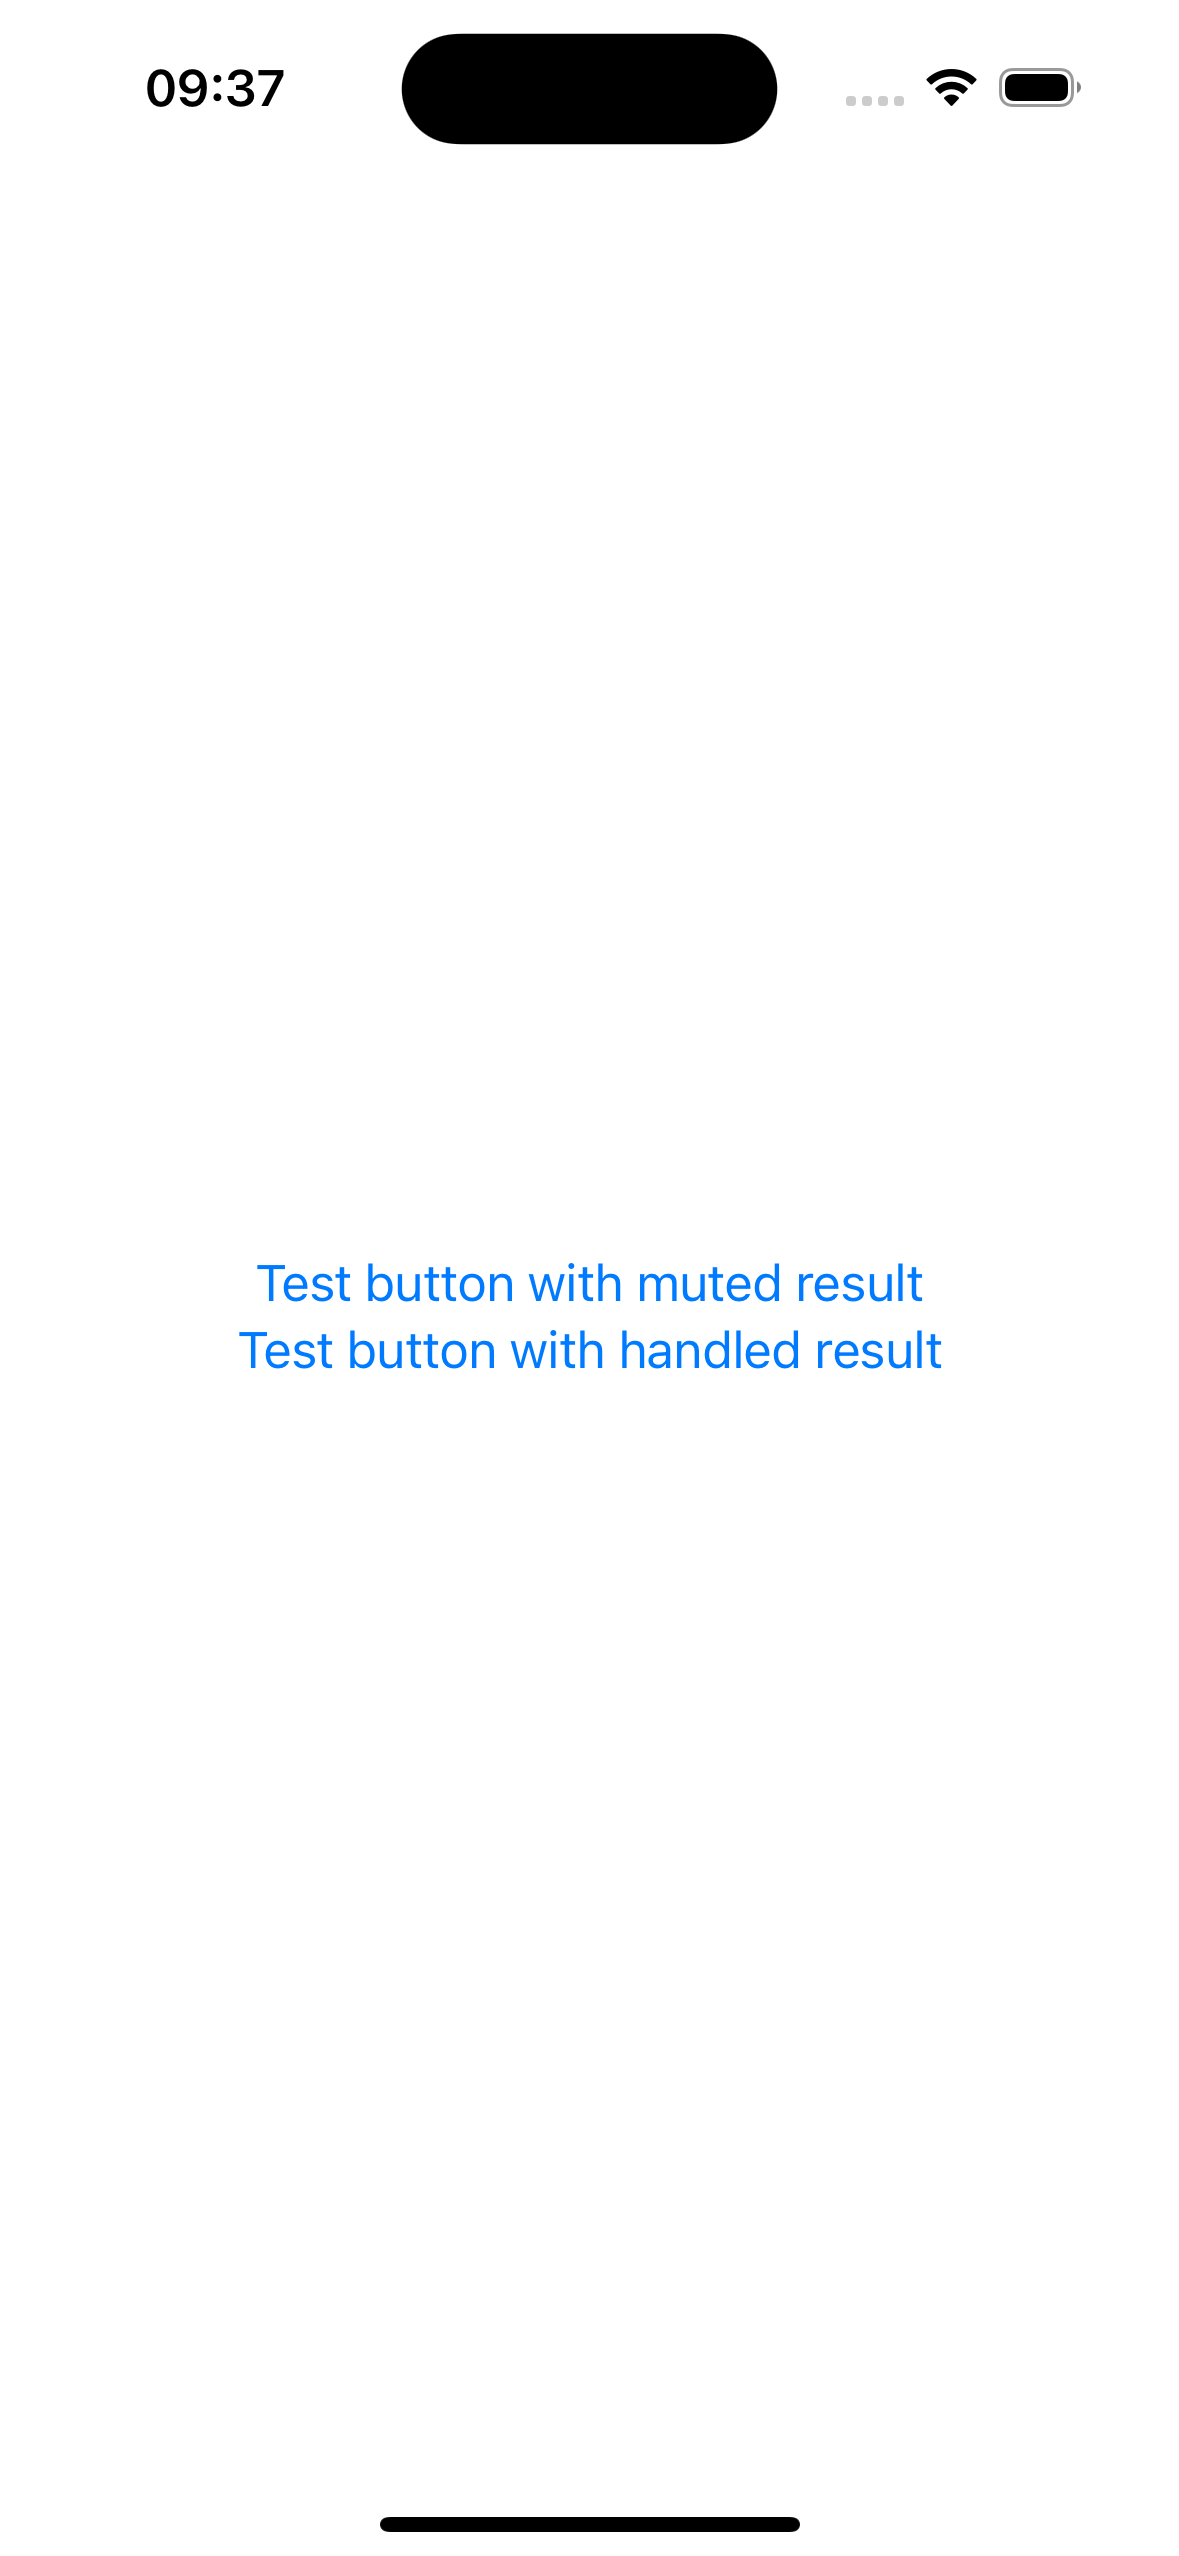
After building, the app screen should look similar to:
-
And after pressing those buttons, you should see in the console something like:
buttonTestActionWithMutedResult() done
Attempt count: 5
The result is: success("makeActionWithSuccessResult(completion:) succeeded!")
buttonTestActionWithHandledResult() done
Hurrah! Here we’re done with connecting our app via SPM.
3. But How to Check if That SDK Works Also Within CocoaPods?
To prepare ourselves for the next step, let’s set up CocoaPods as the dependency manager within our test project. Follow these steps:
- Go to your project directory via the terminal.
- Follow the steps described: CocoaPods Guide :
- Run $ pod init in your project directory.
- Update the Podfile so it looks similar to the example below (note that the pod configuration line may vary depending on your setup):
platform :ios, '17.0'
target 'DMActionTestProject' do
  use_frameworks!
  pod 'DMAction', path: '../../'
end- Run $ pod install in your project directory.
- Open the newly created
.xcworkspacefile (in my case, it isDMActionTestProject.xcworkspace). - Try to build your project.
Important
Don’t be alarmed by the result — if you’ve encountered an error like this:
error: Sandbox: rsync.samba(63624) deny(1)
file-write-create /Users/*YOUR_USER_NAME*/Library/Developer/Xcode/DerivedData/
DMActionTestProject-hkshiekexloasmhaxliplyiaolpp/Build/Products/
Debug-iphonesimulator/DMActionTestProject.app/Frameworks/DMAction.framework/
_CodeSignature (in target 'DMActionTestProject' from project
'DMActionTestProject')

error: Sandbox: rsync.samba(63625) deny(1) file-write-create /Users/*
YOUR_USER_NAME*/Library/Developer/Xcode/DerivedData/
DMActionTestProject-hkshiekexloasmhaxliplyiaolpp/Build/Products/
Debug-iphonesimulator/DMActionTestProject.app/Frameworks/DMAction.framework/
.DMAction.Yd4vcz (in target 'DMActionTestProject' from project
'DMActionTestProject')

error: Sandbox: rsync.samba(63625) deny(1) file-write-create /Users/*
YOUR_USER_NAME*/Library/Developer/Xcode/DerivedData/
DMActionTestProject-hkshiekexloasmhaxliplyiaolpp/Build/Products/
Debug-iphonesimulator/DMActionTestProject.app/Frameworks/DMAction.framework/
.Info.plist.T4NPKh (in target 'DMActionTestProject' from project
'DMActionTestProject')
To resolve this issue, do not forget to change the User Script Sandbox setting from Yes to No (this can be found via the ENABLE_USER_SCRIPT_SANDBOXING key). For more details, check the link: Stack Overflow.
Okay — it’s good enough for now. Let’s move forward to overcome (or even resolve) our issue.
4. To Ensure That We’re Using the SDK Version from SPM or POD we should ensure that only one of them is used at a time.
** But the question is: which one? Here are a few options to solve this:**
- The Easiest Way: Create two different test projects — one for SPM and another for POD — and check all behaviors within these projects. However, this approach is not very useful if you have the same codebase and tests to verify, as it could lead to unnecessary code duplication.
- Enable/Disable SPM or POD Dependencies When Using One of Them:
2.1 When using POD as the dependency manager:
If you want your project to work with the SDK by using POD, you should remove the SDK from SPM and install it via POD.
—Your project’s Podfile should look similar to the following (including the required pod’s SDK):
platform :ios, '17.0'

target 'DMActionTestProject' do
  use_frameworks!
  pod 'DMAction', path: '../../'
end-
To remove the SDK from the SPM dependency in Xcode, follow these steps:
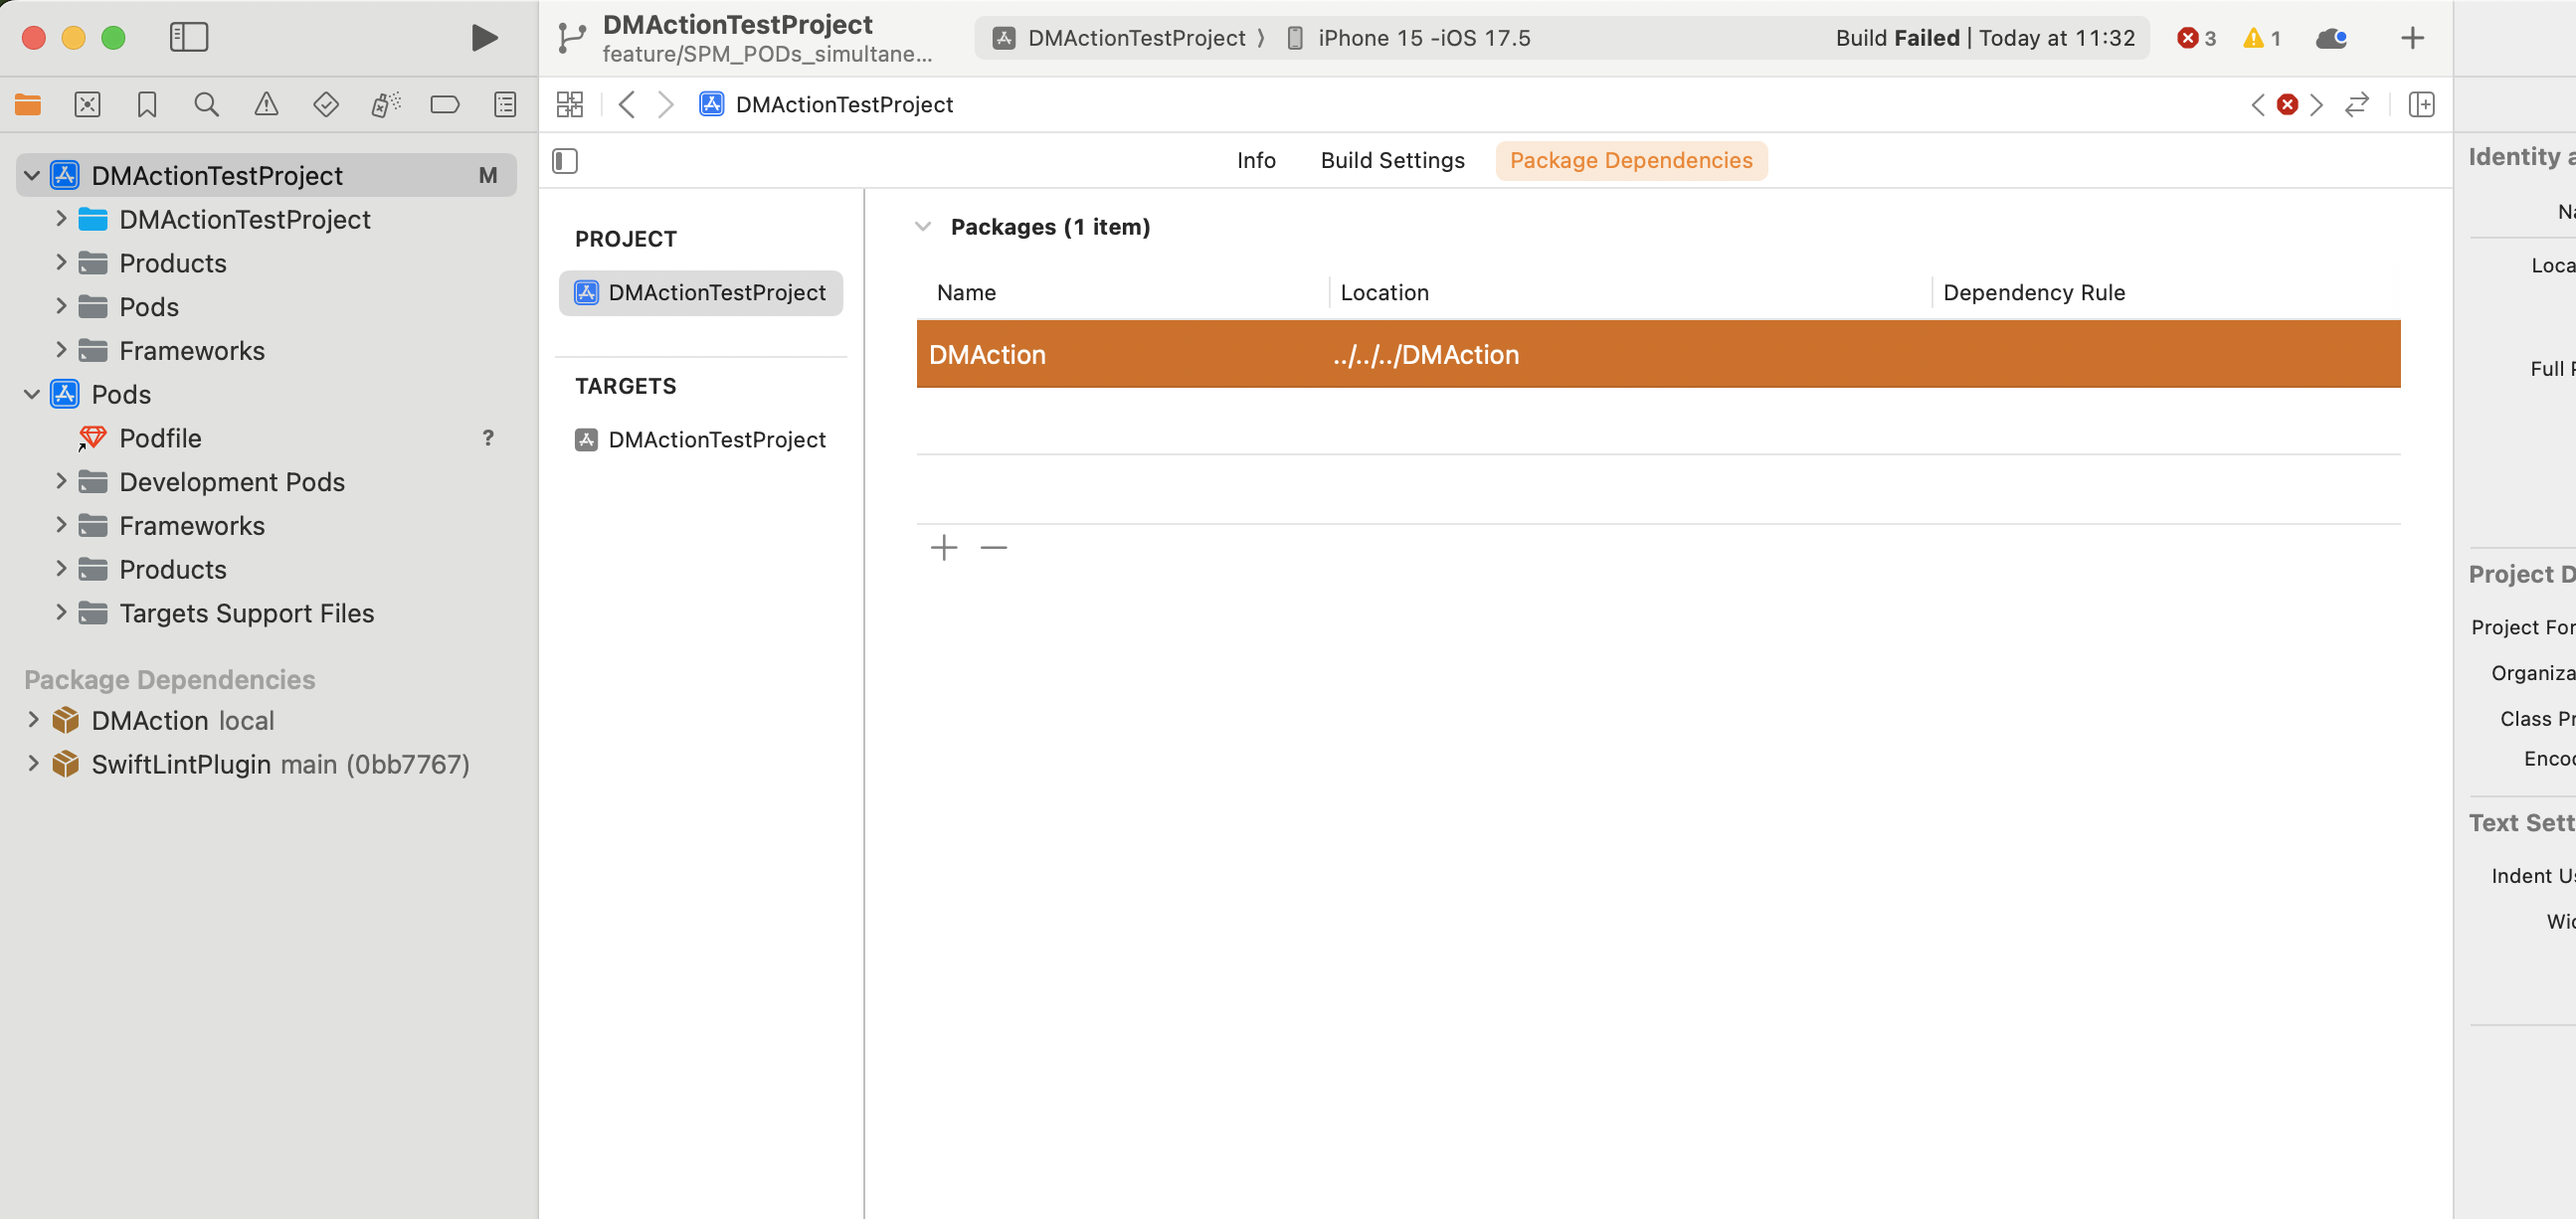
- Select your project (not the target) in the Xcode navigator.
- Go to the Package Dependencies tab.
- Highlight your SDK from the list of dependencies.
- Click the - button located at the bottom-left corner of the window.
-
Delete the SDK from the
Frameworks, Libraries, and Embedded Contentsection on the General tab of your target.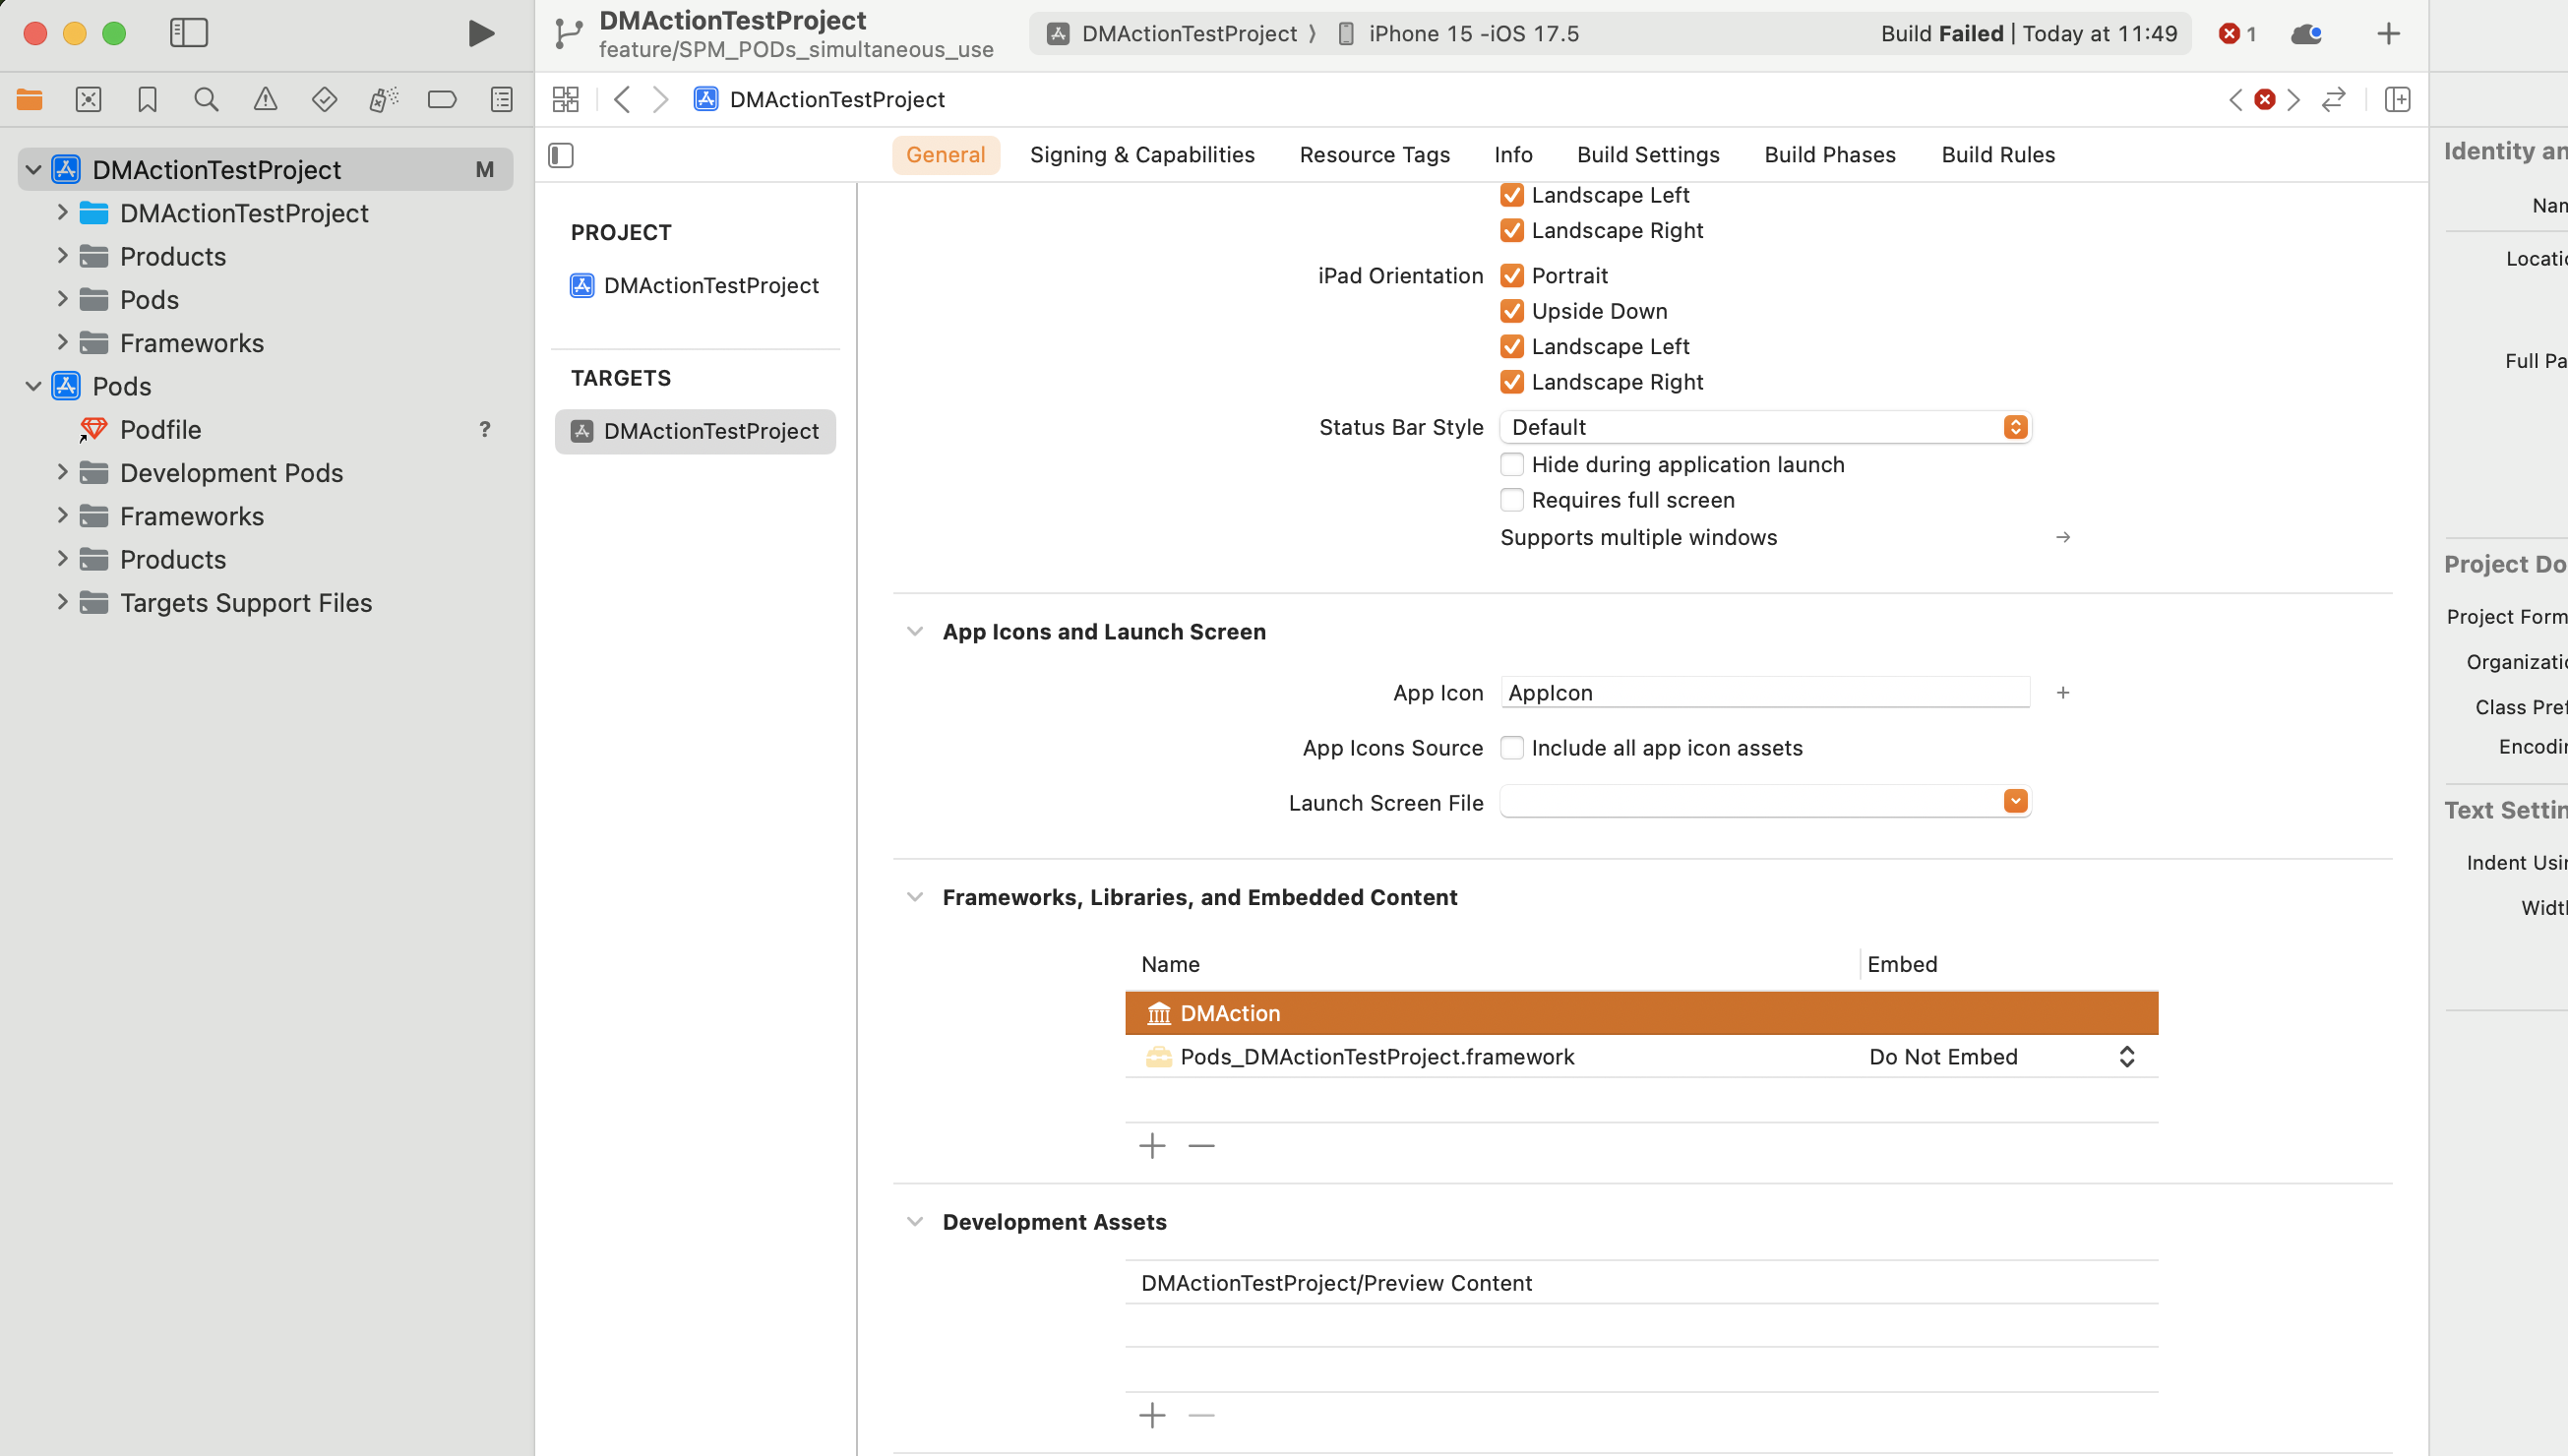
-
Done. Build the project. Now you can be 100% sure that you’re using the POD version of your SDK.
2.2. And in the Opposite Way: Remove the SDK from POD and Add It as an SPM Dependency:
This approach isn’t very practical if you need to switch between the two dependency managers frequently. However, let’s take a look at how to do it anyway:
- Your project’s Podfile should look similar to the following (exclude the required pod’s SDK):
platform :ios, '17.0'

target 'DMActionTestProject' do
  use_frameworks!
  #pod 'DMAction', path: '../../'
end- Check out the Add SDK as Dependency via SPM stage described above for further steps.
- Done. Build the project. Now you can be 100% sure that you’re using the SPM version of your SDK.
5. Yes, hooray! We can do it in a useful way.
** Let’s describe this process step by step: **
- Improve the Podfile a Bit:
platform :ios, '17.0'

helper_file = File.expand_path('podInstall_helper.rb', __dir__)
if File.exist?(helper_file)
  require_relative 'podInstall_helper'
else
  puts "Error: Helper file 'podInstall_helper.rb' not found!"
  exit 1
end

# Print the DEPENDENCY_MANAGER being used
current_dependency_manager = dependency_manager
puts "#{LOG_INFO}: >>> Using #{DEPENDENCY_MANAGER_KEY}: `#{current_dependency_manager}` <<<"

# Run cleanup before installing pods
clean_xcode_project(PROJECT_NAME)

# Main target configuration
target PROJECT_NAME do
  # Conditionally include the DMErrorHandling pod
  if is_pod_configuration(current_dependency_manager)
    use_frameworks!
    pod 'DMAction', path: '../../'
  end
end

# Save the dependency manager to a file (optional, if you want to persist it)
save_dependency_manager(current_dependency_manager)- In the root directory of your project, create a new file named podInstall_helper.rb . This file will act as a helper for our Podfile, delegating most of the tasks to this script.
Fulfill the File with Code (copy and paste the following code into the podInstall_helper.rb file):
# Define constants for dependency manager settings
PROJECT_NAME = 'DMActionTestProject'
DEPENDENCY_MANAGER_POD = 'POD'
DEPENDENCY_MANAGER_SPM = 'SPM'
DEPENDENCY_MANAGER_KEY = 'DEPENDENCY_MANAGER'
DEPENDENCY_MANAGER_FILE = '.dependency_manager'
VALID_DEPENDENCY_MANAGERS = [DEPENDENCY_MANAGER_POD, DEPENDENCY_MANAGER_SPM]
LOG_INFO = 'Info'
LOG_ERROR = 'Error'

# Helper function to validate the dependency manager value
def valid_dependency_manager?(value)
  VALID_DEPENDENCY_MANAGERS.include?(value)
end

# Main function to determine the dependency manager
def dependency_manager
  # Helper function to read the dependency manager from the environment variable
  def read_from_env
    env_value = ENV[DEPENDENCY_MANAGER_KEY]
    if env_value
      if valid_dependency_manager?(env_value)
        return env_value
      else
        puts "#{LOG_ERROR}: Invalid #{DEPENDENCY_MANAGER_KEY} value '#{env_value}' provided in the environment. Ignoring it"
      end
    end
    nil
  end

  # Helper function to read the dependency manager from the file
  def read_from_file
    return nil unless File.exist?(DEPENDENCY_MANAGER_FILE)

    File.readlines(DEPENDENCY_MANAGER_FILE).each do |line|
      if line.start_with?("#{DEPENDENCY_MANAGER_KEY}=")
        file_value = line.strip.split('=').last
        if valid_dependency_manager?(file_value)
          puts "#{LOG_INFO}: #{DEPENDENCY_MANAGER_KEY} value '#{file_value}' was picked up from the file '#{DEPENDENCY_MANAGER_FILE}'"
          return file_value
        else
          puts "#{LOG_ERROR}: Invalid #{DEPENDENCY_MANAGER_KEY} value '#{file_value}' found in the file '#{DEPENDENCY_MANAGER_FILE}'. Ignoring it"
        end
      end
    end
    nil
  end

  # Try reading from the environment variable
  env_value = read_from_env
  return env_value if env_value

  # Try reading from the file
  file_value = read_from_file
  return file_value if file_value

  # If no valid value is found, print an error message and default to "POD"
  puts "#{LOG_ERROR}: Invalid or missing #{DEPENDENCY_MANAGER_KEY} value. Defaulting to '#{DEPENDENCY_MANAGER_POD}'"
  DEPENDENCY_MANAGER_POD
end

# Save the current dependency manager to a file (optional)
def save_dependency_manager(manager)
  File.write(DEPENDENCY_MANAGER_FILE, "#{DEPENDENCY_MANAGER_KEY}=#{manager}")
  puts "#{LOG_INFO}: Manager '#{manager}' was successfully saved in the file '#{DEPENDENCY_MANAGER_FILE}'"
rescue StandardError => e
  puts "#{LOG_ERROR}: Failed to save dependency manager: #{e.message}"
end

# Define a helper method to execute shell commands with optional info and error messages
def command(cmd, info_text: nil, error_text: nil)
  # Execute the command and capture both stdout and stderr
  output = `#{cmd} 2>&1`
  exit_status = $?.exitstatus

  # Check if the command succeeded or failed
  if exit_status == 0
    puts "#{LOG_INFO}: #{info_text}" if info_text # Print the info message if provided and command succeeded
  else
    puts "#{LOG_ERROR}: #{error_text}. Exit status: #{exit_status}. Output: #{output}" if error_text # Print the error message if provided and command failed
  end

  exit_status # Return the exit status for further handling if needed
end

# Clean the Xcode project before installing pods
def clean_xcode_project(project_name)
  puts "#{LOG_INFO}: Cleaning Xcode project..."

  # Helper method to extract and filter schemes
  def extract_schemes(schemes_output)
    schemes = []
    capturing = false

    schemes_output.lines.each do |line|
      # Start capturing when we encounter the "Schemes:" line
      if line.strip.start_with?("Schemes:")
        capturing = true
        next
      end

      # Stop capturing when we encounter a blank line or reach the end
      if capturing && line.strip.empty?
        break
      end

      # Capture non-empty lines as scheme names
      if capturing && !line.strip.empty?
        scheme_name = line.strip

        # Filter out unwanted schemes (e.g., Pods-related schemes)
        unless scheme_name.include?("Pods-") || scheme_name.match?(/\(.*\)/) || scheme_name.empty?
          schemes << scheme_name
        end
      end
    end

    schemes
  end

  def pluralize(count, singular, plural)
    count == 1 ? singular : plural
  end

  begin
    # List all schemes in the workspace
    schemes_output = `xcodebuild -workspace #{project_name}.xcworkspace -list 2>/dev/null`
    if $?.success?
      schemes = extract_schemes(schemes_output)

      verb = pluralize(schemes.size, "was", "were")
      puts "#{LOG_INFO}: #{schemes.size} scheme#{'s' if schemes.size != 1} #{verb} found: #{schemes.join(', ')}"

      schemes.each do |scheme|
        puts "#{LOG_INFO}: Cleaning workspace for scheme: #{scheme}"
        command(
                "xcodebuild clean -workspace #{project_name}.xcworkspace -scheme #{scheme} >/dev/null",
                error_text: "Failed to clean xcodebuild workspace '#{project_name}' with scheme '#{scheme}'"
                )
      end
    else
      puts "#{LOG_ERROR}: Failed to list schemes. Skipping cleaning"
    end

    # Remove DerivedData
    derived_data_path = File.expand_path('~/Library/Developer/Xcode/DerivedData')
    if Dir.exist?(derived_data_path)
      puts "#{LOG_INFO}: Removing DerivedData..."
      exit_status_derived_data_path_removing = command(
                                                       "rm -rf #{derived_data_path}",
                                                       error_text: "Failed to remove '#{derived_data_path}'"
                                                       )
      if exit_status_derived_data_path_removing != 0
        puts "#{LOG_INFO}: ! Try to close the Xcode project and retry once again !"
      end
    else
      puts "#{LOG_INFO}: DerivedData directory not found"
    end

    puts "#{LOG_INFO}: Cleanup complete!"
  rescue StandardError => e
    puts "#{LOG_ERROR}: Error during cleanup: #{e.message}"
  end
end

# Define a helper to check if the dependency manager is 'POD'
def is_pod_configuration(manager)
  manager == DEPENDENCY_MANAGER_POD
end- Create a new file in the project root directory:
.dependency_manager. We’ll use it to save the latest Dependency Manager that we’ve used. So it can be picked up just by executing thepod installcommand. Don’t forget to add it to your project’s bundle by copying it into Xcode.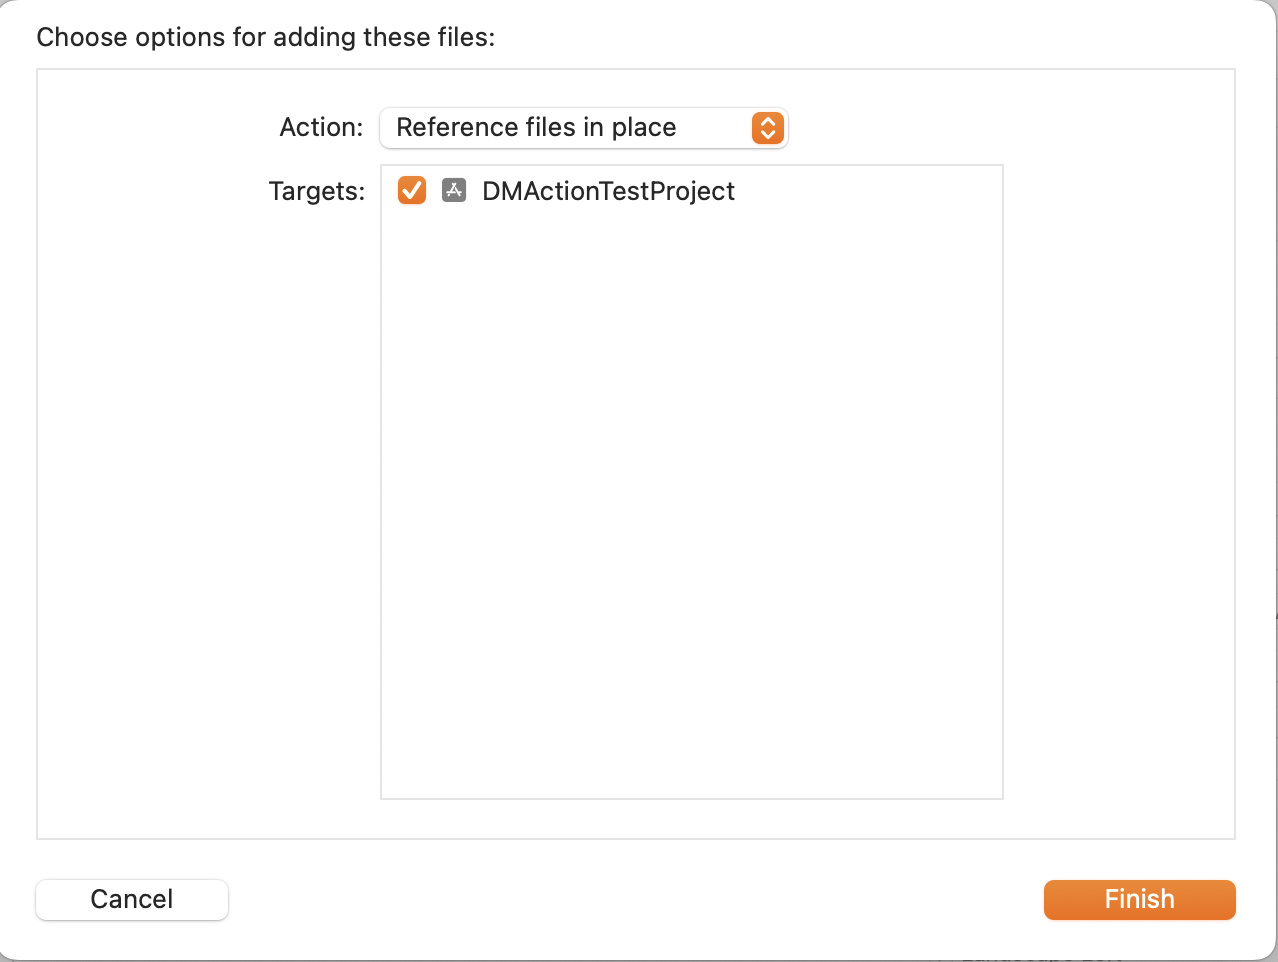
How to Use It
- Just run pod install as you normally would for other dependencies—the rest will be handled automatically by our script.
- All necessary steps will be performed without manual intervention. To specify the dependency manager, you can simply run one of the following commands:
- Default behavior :
pod install- For
SPM:DEPENDENCY_MANAGER=SPM pod install - For
CocoaPods:DEPENDENCY_MANAGER=POD pod install
- For
What Does the Script Do?
We’ve logged all steps in the console, so after running pod install, you can see something like this:
pod install
  Error: Invalid or missing DEPENDENCY_MANAGER value. Defaulting to 'POD'
  Info: >>> Using DEPENDENCY_MANAGER: `POD` <<<
  Info: Cleaning Xcode project...
  Info: 2 schemes were found: DMAction, DMActionTestProject
  Info: Cleaning workspace for scheme: DMAction
  Info: Cleaning workspace for scheme: DMActionTestProject
  Info: Removing DerivedData...
  Info: Cleanup complete!
  Info: Manager 'POD' was successfully saved in the file '.dependency_manager'
  Analyzing dependencies
  Downloading dependencies
  Generating Pods project
  Integrating client project
  Pod installation complete! There is 1 dependency from the Podfile
and 1 total pod installed.
Let’s Break Down What’s Happening Here:
Error: Invalid or missing DEPENDENCY_MANAGER value. Defaulting to 'POD'This message informs us that the script attempted to read the.dependency_managerfile to determine the previously used dependency manager but did not find a valid or existing value. As a result, it defaults to using POD as the dependency manager.Info: >>> Using DEPENDENCY_MANAGER: POD <<<This line confirms that the script has selected POD as the active dependency manager for the current operation. It ensures transparency in the process, so you know exactly which dependency manager is being used.Info: Cleaning Xcode project...At this stage, the script performs essential cleanup tasks to avoid conflicts or residual data from previous builds. Specifically:
- It cleans the workspace for schemes in the project.
- It removes the DerivedData folder, which stores intermediate build files and cached data. These steps help ensure a fresh start for the dependency setup.
-
Info: Cleanup complete!This message indicates that the cleaning process has been successfully completed. If any errors occur during this step, the script provides a helpful tip: close any open Xcode projects and rerun the command to resolve potential issues. -
Info: Manager 'POD' was successfully saved in the file '.dependency_manager'Once the cleanup is complete, the script saves the currently selected dependency manager (POD ) into the.dependency_manager file. This ensures that subsequent operations will default to the same dependency manager unless explicitly changed. -
The rest belongs to CocoaPods’ script itself. The remaining output (e.g., analyzing dependencies, downloading dependencies, generating the Pods project) is generated by CocoaPods’ internal processes and does not involve our custom script.
Let’s Try to Swap Our Dependency Manager to SPM
- Run in the terminal:
DEPENDENCY_MANAGER=SPM pod install- The output should look something like this:
DEPENDENCY_MANAGER=SPM pod install
  Info: >>> Using DEPENDENCY_MANAGER: `SPM` <<<
  Info: Cleaning Xcode project...
  Info: 2 schemes were found: DMAction, DMActionTestProject
  Info: Cleaning workspace for scheme: DMAction
  Info: Cleaning workspace for scheme: DMActionTestProject
  Info: Removing DerivedData...
  Info: Cleanup complete!
  Info: Manager 'SPM' was successfully saved in the file '.dependency_manager'
  Analyzing dependencies
  Downloading dependencies
  Removing DMAction
  Generating Pods project
  Integrating client project
  Pod installation complete! There are 0 dependencies from the Podfile and 0 total pods installed.

  [!] The Podfile does not contain any dependencies.
So now you can be 100% sure that your project is using the SDK dependency from SPM.
Important
If you encounter any errors while building your project after swapping the dependency manager, try closing the currently open Xcode project and reopening it. In most cases, this resolves the issue.
Conclusion
Using Swift Package Manager (SPM) and CocoaPods can be easy and even fun! Feel free to take and modify the scripts I’ve shown you in this article to improve your project further. I’d be happy to know that you achieved your goal and found this article helpful!
Thank you for reading!
Happy Coding! 🚀
…